Watch the video or read the blog to learn all about how to find the correct coil spring for you and your mountain bike's rear shock
So your bike has an air shock but, you’re wanting to get one of those sweet coil shocks for better sensitivity and performance. You know you can easily adjust your air shocks sag with a shock pump, but wait! These coil shocks don't have an air valve. Alright, I'll just buy a coil spring but what the heck!? There are a hundred different options and I don’t know what these numbers mean.
In this blog, we're going to show you how to choose the right coil spring for your mountain bike's new rear shock.
With a coil shock, you can’t just take a little air out and make it feel softer or add a little bit of air to make it stiffer. This makes proper set up a bit more time-consuming than an air shock. Since there’s no air chamber on a coil shock to keep it from collapsing on itself, it uses a spring to do that job instead. There are many benefits of a coil spring over an arising like better small bump sensitivity due to less friction, but that’s a whole other topic.
Coil Spring Jargon
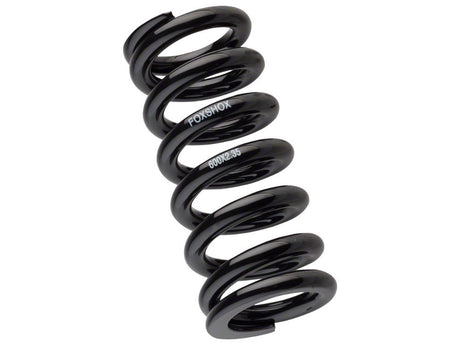
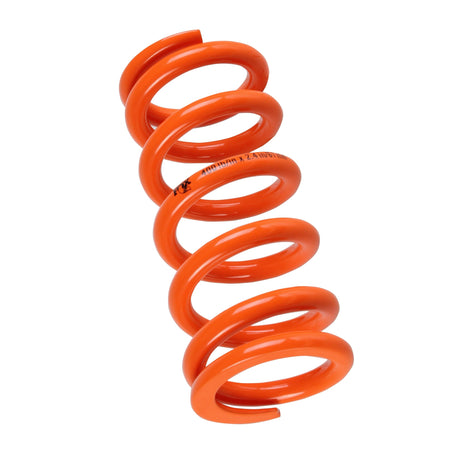
So when you’re looking at an MTB coil spring's specs you’ll notice there are two different numbers associated with them. For example, let's take a look at this spring from Fox. Stamped on the spring it says 450 x 2.37”.
Fox Spring
The first number is the spring rate. This means that it requires 450 pounds of force to compress it one inch from a preset position. The preset position varies between manufacturers. The second number is the free stroke of the spring, meaning you can compress the spring 2.37” before it has coil bind. Coil bind is when the spring bottoms out on itself, and it cannot be compressed any further. This is bad and you want to avoid this because you might start blowing up other parts from a super abrupt and harsh bottom out.
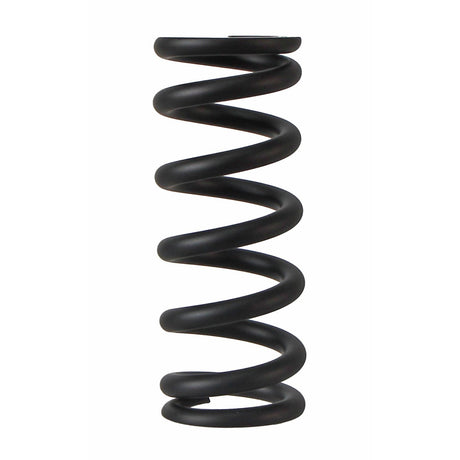
Some spring manufacturers label their free stroke as the maximum shock stroke size that it can be used with. For example, this Cane Creek spring is labeled "55mm." This means the max recommended rear shock stroke size you can use with this spring is 55mm. Yes, this might seem pretty confusing but most spring manufacturers have a chart on their website letting you know which spring to use with your size coil shock.
Cane Creek Spring
Now, let's jump back to the first number - the spring rate.
Rear Shock spring rates typically come in 50-pound increments, but some springs, like the Fox SLS spring, come in 25-pound increments. A very common misconception is that spring rate is directly correlated with your body weight - this is not true. If you're 175 pounds, there is typically not a spring rate that you can use and swap between different bikes.
Spring rate is directly correlated with a combination of your body weight and your bike's suspension design.
Leverage ratio is the ratio of rear-wheel travel to shock stroke. Now let's say, as an example, that your frame has a 2.5:1 leverage ratio. For every 2.5mm that your rear wheel travels, your shock compresses 1mm. Different suspension designs have different leverage rations meaning you will most likely not be able to use the same spring rate between different bikes.
The first number, which is the spring rate, is going to be matched to your body weight and your bike's suspension design. That second number is going to be matched to the size of shock your bike uses.
Also, this number isn’t really ever stamped on a spring but different brands of springs have different inner diameters. Your spring inner diameter needs to match your shock body's outer diameter where the spring sits. If you have a Fox Shock, a Fox spring will directly onto it. However, if you like to use an MRP Spring on your Fox Shock, MRP makes spring adapters to make their spring's inner diameter smaller and fit on a Fox Shock. Without these adapters, a larger spring will be super loose and rattle around on the shock. The same rule applies to some other combinations of springs and shocks. However, not all springs can be adapted to all shocks. Double-check to see if the spring you’d like to use can be adapted to your shock.
So to get started with your spring selection, first find which spring will fit your brand of shock and the size of shock the bike uses as this is easier to find. Then you’ll find the proper spring weight for your bodyweight and suspension design.
Alright, so how do I find which spring rate to use? Well, let's finally dive into that procedure
Finding The Correct Coil Spring Rate For You And Your Rear Shock
If you just randomly guess which spring rate to use, you’re most likely going to have a bike that rides way too stiff or way too soft. Since you can’t just use a shock pump to make changes, you’re going to have to do a little bit of work to pick the proper spring rate for you and your bike. Luckily we have three ways of doing this to make it easy.
1. Call The Company That Makes Your Bike
Do you have a Devinci Spartan, and want to put a coil shock on it? Simply start by calling Devinci to see if some guys around the shop are running a coil shock on the same bike you have. If they are, they likely have already experimented with spring rates and could probably give you a pretty good inkling as to which spring rate you should use. Some companies will even have a spring rate chart that they can share with you for some models of their bikes. Most smaller bike companies that are owned and operated by riders will make this a pretty easy task. If, however, you have a bike from a larger company like Trek or Giant, it may be a little tougher to get this information directly from the source.
Alternatively, you could call a bike shop that sells the same brand of bike you own to see if anyone in the shop has the same bike and is running a coil shock. They can let you know what spring rate they have landed on for their body weight. At the very least, this will be a good start to finding the right spring rate for your MTB rear shock.
Overall, this will take the guessing game out of your search because somebody who has actually ridden the same bike as you with a coil shock set up has already figured out which spring rate gets them that sweet spot of proper sag and stiffness.
2. Use A Spring Rate Calculator
When a customer calls us to ask which spring rate to use on a bike that we have never ridden with a coil shock, we steer them towards our Spring Calculator. Simply input your body weight with all of your riding gear, your shock’s stroke, and your bike's rear-wheel travel. Click “calculate” and you will receive a number.
In this example, I’ve entered my weight while geared-up along with the shock stroke and frame travel from a 2019 Devinci Troy. The calculator recommends a spring rate of 488. However, there is no such thing as a 488-pound spring rate, so you will have to take this number and apply it to springs that are available in the real world. You will now need to decide which model of spring you’d like to use so that you can accurately round up or down to match that 25- or 50-pound increment that your spring is available in. A select number of spring models, like the Fox SLS, come in 25-pound spring increments. However, most springs only come in 50-pound increments.
We always recommend starting with the cheapest steel spring compatible with your shock. Spring calculators are really only able to give you a rough idea of where to start, and there is no guarantee that the first spring you start with is going to be the perfect, long-term spring rate for you. It doesn’t feel great when your $130+ Fox SLS or progressive spring turns out to be the wrong spring rate and you instantly need to purchase a different one. So to start, we will only be comparing the numbers to 50-pound spring increments.
In this example. I would personally be considering both a 450 and 500-pound spring rate to start with. I know 450 would be slightly softer, and 500 would be more firm. I would have likely started with a 500-pound spring to start as I would much rather have a bike that is slightly too stiff than super mushy and soft. We intentionally set up this calculator to run slightly too firm to avoid potentially experiencing a very soft and mushy bike on your first ride. When I actually installed some springs and measured sag, the 450-pound spring sits at exactly 30% sag, so the calculator did run slightly high. However, I don’t think a 500-pound spring would have felt so bad that it would have ruined my ride, but a 400-pound spring would have felt like I was riding through molasses.
Let’s do one more example. If I punch in the information from my previous bike, a 2019 Kona Process 153, it recommends a 422-pound spring rate. I chose to try a 425-pound Fox SLS spring which actually landed me right at my target sag of 30%. So the calculator did work out excellent on the first try with this example, but this is not very common and you should not expect yours to calculate your spring rate perfectly like this.
The examples above go to show just how different the calculator rendors recommendations from bike to bike, and this is totally normal. No spring calculator is going to be 100% accurate due to so many variances in the engineering of different bikes’ suspension designs. However, at the very least the calculator will give you a great ballpark idea of which spring rate to start with.
3. Search The Forums
Just like method number one, you’re basically trying to find a real human being who has experimented with a coil shock set up on the same bike you own. Typically, this method is sort of a pain in the butt because forums can be super confusing with information coming from all sorts of people from all over the place who may or may not have a good technical understanding of bikes.
Whether you create a new thread asking for help or search through tons of preexisting threads, you’re certain to find a decent amount of information. This information, however, may or may not be accurate. We’ve seen customers have good look with this method who did not want to put their trust in to the calculator and couldn’t find good information from their bike company so we figured we’d list this an option.
Alright, you're done with the stupid computer, you’ve picked which spring rate you’d like to start with, now it's time to install this bad boy on your bike.
Setting Up A Coil Spring On Your Mountain Bike's Rear Shock
- Start by moving the bottom out bumper all of the ways to the top of the stanchion.
- Then install the spring on your shock with the preload adjuster use tight enough so the spring doesn’t move around and has play.
- Next, tighten the preload adjuster nice and snug. We recommend about one full turn from when the spring stops wiggling to avoid is loosening while you’re riding.
- Then install the shock on your bike. Check to see where your sag is the same way you would with an air shock but you’ll use the bottom out bumper as the sag ring. It's a little harder to move the bumper up and down since the spring is in the way, so you’ll probably need to use a soft, thin tool such as a tire lever to reach in and move it back up if need be (this is why we start by moving the bumper all the way up before installing the spring).
- Now put on your riding gear so you’re at full rider weight when you’re checking your sag. Very gently sit on the saddle making sure not to bounce the shock since you can't easily reach down and lift the bumper back up.
- Then lift your feet off the ground and stand up off the bike. Measure the distance between the dust wiper and the top of the bumper.
- Last, divide that by the stroke of the shock, move the decimal point two numbers to the right, and voila! That is your sag percentage.
Measuring sag
Please note that it is very common to see people check their shock sag standing in a riding position. But, we prefer to do this sitting on the saddle as this creates a more consistent reading since standing can create some inconsistencies, and it's much easier to do by yourself.
Please keep in mind that sag is not the “end all, be all” to determine wrong or right, but your frame's recommended sag is a good place to start. Recommended sag generally ranges from 25-35%, but 30% sag is a common amount. In the end, your personal riding style will dictate or how soft or stiff you run your suspension. Using sag as a reference is a pretty good way to keep track of things.
If you have less than your ideal sag, the spring you chose is likely too stiff but, many bikes these days are designed around an air shock. As a result, your new linear coil shock might require a stiffer spring so you aren’t constantly blowing through travel. Give the bike a ride on a trail you ride often to see if you can reach the bottom out or not and pay attention to feel if the rear end feels too stiff. If the rear end is stiff and you cant reach bottom-out, then you’ll need to go down a spring rate. Don’t worry, you can keep that spring for bike park days when you're hitting bigger stuff for more bottom-out resistance or sell it pretty quick.
Now, if you have more than ideal sag, you can make some small adjustments with the springs preload adjuster. Most likely, however, the spring is too soft. The amount of preload you add to spring does not change its rate. This simply stiffens the initial part of the stroke and will result in just a little less sag. Plain and simple, you cannot fix an improper spring rate by adding tons of preload. More preload will not make your shock bottom out less, it only stiffens the initial part of the stroke.
On average, you can only add about 5mm of preload and Fox/Marzocchi recommends only adding one full turn of spring load to their springs. If the spring is just way to soft or waaaay to stiff, then you’re going to need to use your best judgment of what to do since its obvious something was off. Go back and check to see if you entered the information correctly into the calculator being sure that your weight is in pounds or kilograms as intended, wheel travel is in inches or millimeters as intended, etc.
One more tidbit of information. Let's say you have a 500-pound spring, and you find you’re right around your target sag but your bottoming out way too much. Well, you can get a progressive spring which are currently made by Cane Creek and MRP. This means a 500 pound MRP Progressive spring is rated at 475 pounds at 25% of the stroke, rated at 600 pounds at 75% off the stroke. This means you’ll have a spring that’s nice and soft off the top of the stroke, but supportive at the bottom of the stroke with more bottom out resistance.
If you’d like to learn more about this, we have a whole video about progressive springs.
Last but not least, some bikes just aren’t designed to use a coil shock. There might be some give and take with your coil shocks setup. You might need to run a spring that’s a little too soft off the top so you aren’t bottoming out all of the time but hey, thats just a possible side effect of going coil.


